
Run Your First Test – Right Now

Hey I’m Shane, welcome to another issue of The CRO Weekly where each week I explore how to build a high converting Ecommerce store. If you’re not subscribed you join 833 people that are right here:
I’m going to let you all in on a little secret of mine:
Running tests is actually not that hard.
Sure, most tests require a bit of technical know-how and some require writing a whole bunch of code.
But that doesn’t mean you can’t start testing things and learning right now. Once you run a test and start seeing the data come in it will inspire you to do more. Then over time you can learn about things like how to run advanced tests, how to choose tests to run, and how to get all the nuanced statistics right.
That’s the boring stuff though. So in this post I’m going to walk you through setting up your first test. It’ll only take a few minutes and will give you a good idea of what’s possible.
What to test?
The hardest part of my job is deciding what to test. Walking you through how I collect data, analyze it, and prioritize ideas is a topic for another day.
Instead of worrying too much about whether the test is a winner or not we’re going to just get started. You can get more rigorous about the selection process in the future.
The test we’ll be running today is inspired by Patrick Coddou of Supply.
He thought that the CTA in his home page’s hero should send customers to their starter kit. It was their highest price point offering and he could make the argument it was best for customers. Instead of just getting a razor they get everything they need for a better shaving experience.
But then he had the idea that maybe he should just send people straight to their razor. Starting at $75 it’s the cheapest entry point for a new customer. The other option was to send people to a collection of all of their products and let them choose how to shop.
So he ran the test and here were the early results (I believe these held for the rest of the test):


Pretty compelling. His original idea was clearly the loser. Now I’m going to show you how easy it is to run this test for yourself.
Configuring Google Optimize
This is boring but I promise it will only take a few minutes. You can skip to the next section and come back to this if you’re not sitting at your computer right now :)
First thing you’ll need to do is create an account on Google Optimize. Once you sign in you should see this “Create Account” button.

Click that and you’ll be asked to name it, accept their terms, and then add your website’s URL. Once you’ve set up your account you should land on this screen:

Hitting “Let’s go” will have you start creating your first test. We’re going to name our test “001 - Home - Change Hero CTA Link” and choose the A/B test option. The editor page URL is the page optimize will load when we use their visual editor. Since we’re running the test on the home page you’ll want to just include your website’s URL i.e ‘supply.co’

Before we start setting up the actual test you’ll need to link your Google Analytics account. Scroll down and click on the button to do so. Select the GA account for your site and now you’ll be able to add experiment objectives:
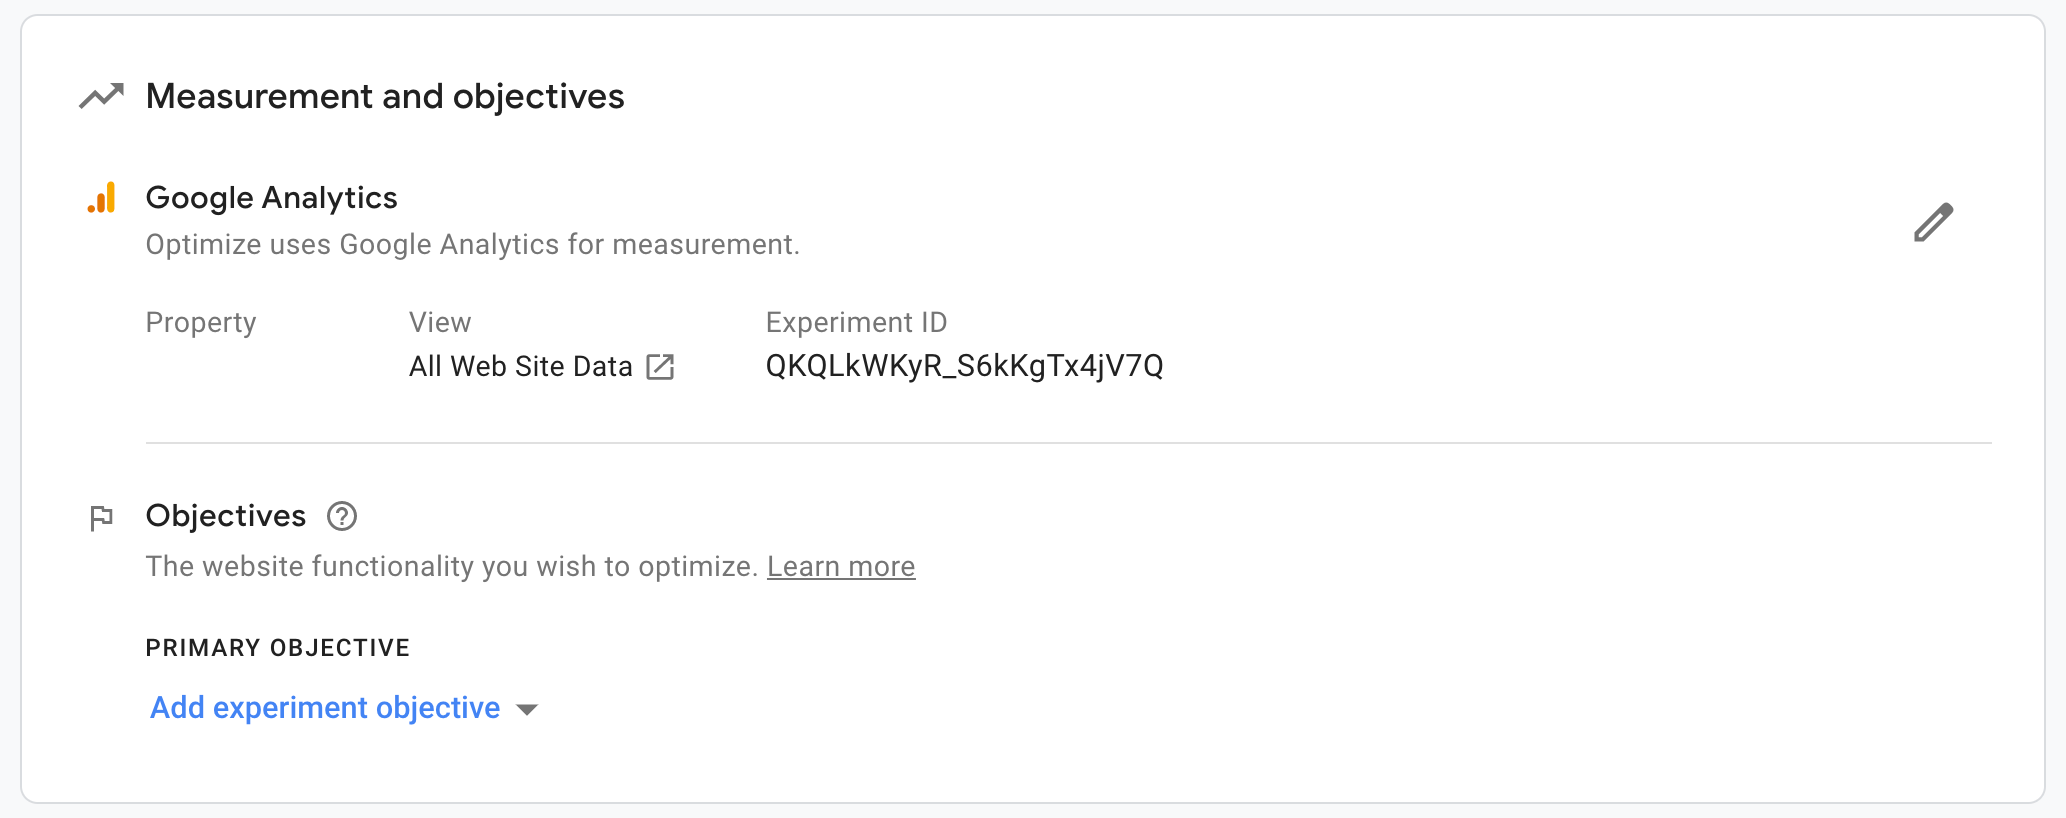
Add an objective, select “Choose from List” and then add the “Transactions” objective. This will make it so your test is measuring your conversion rate. Then, add an additional objective and select “Revenue”. This will make it so you can track your revenue per session for each variant.
Okay only one more thing! Follow the instructions to install the Optimize code snippet on your site:

Basically, take the code they give you and go to your theme’s code files. Find `theme.liquid` and add the snippet right below the <head> tag.
Woo! Now we’re ready to actually set up the test.
A couple quick notes
Before we set up the test there’s a couple things I want to mention. First, I only recommend testing one variant against the original. In Patrick’s test he had 3 variants (original, link to collection, link to razor) but that’s okay for him because Supply gets a ton of traffic. I won’t bore you with the details but I’ve written an entire post on sample sizes and why they’re important.
Second, where you send traffic to is highly dependent on your product catalogue. If you have 3 products you can test sending them to your best seller vs sending them to a collection. If you have hundreds of products, you can test sending them to a collection of all of your products vs a collection of best sellers.
I’m going to continue to use Supply for this example.
Setting up the test
Okay so at the top of the page you’re going to hit “Add Variant” and give it a name. I’m naming mine “Hero CTA Links to Razor.”
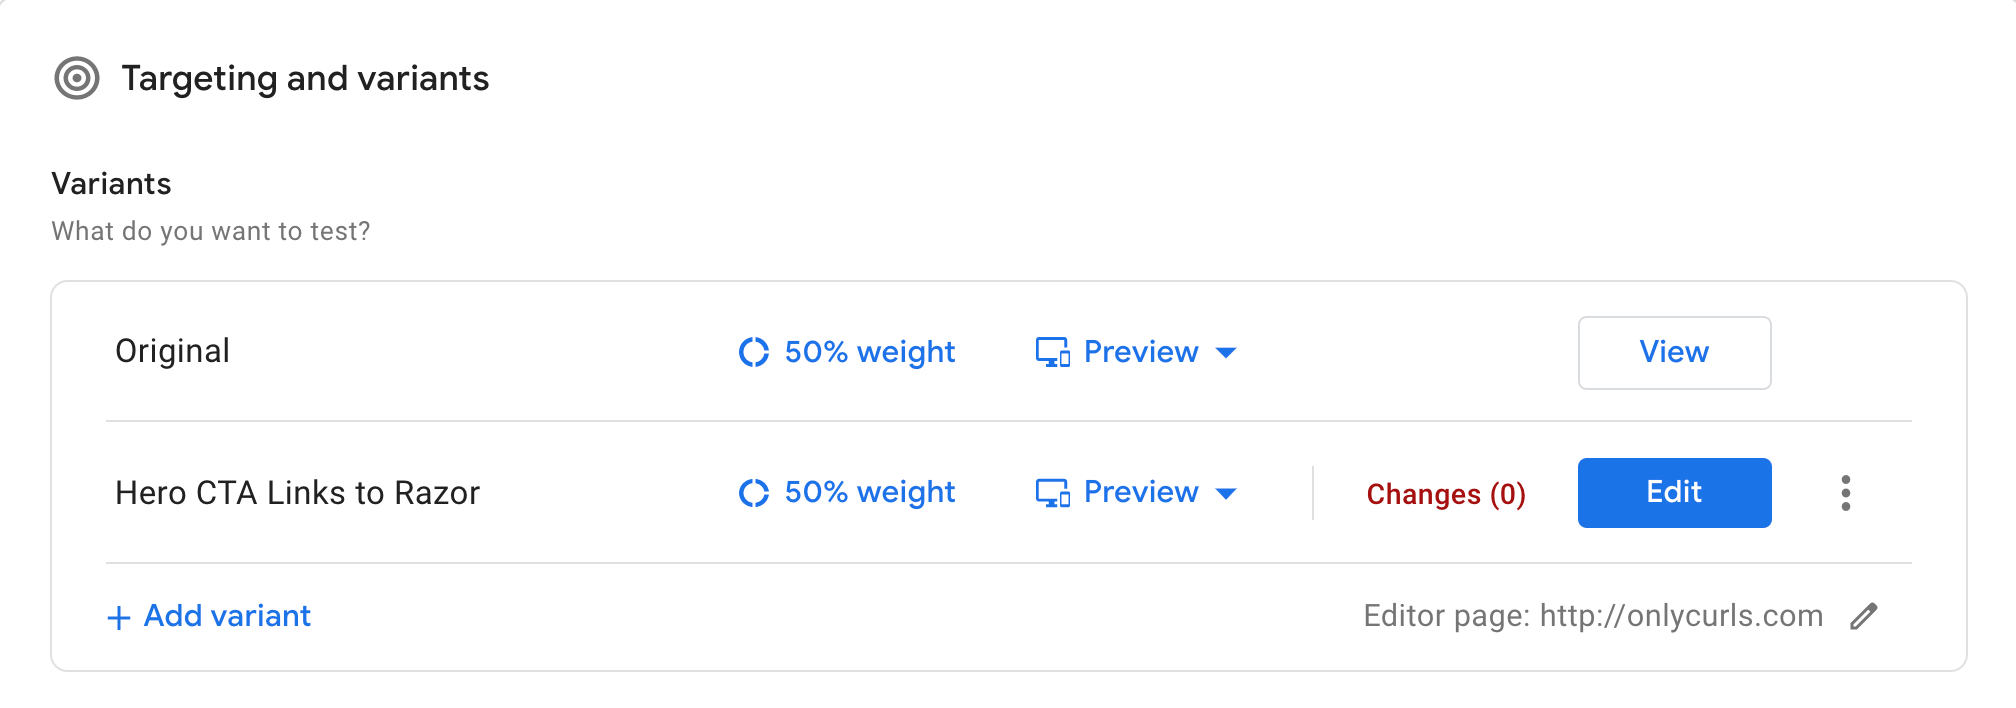
Now we have our original (what’s currently on our site) and the variant we’re going to make changes to. To start making changes we’re going to hit ‘edit’ and you’ll see something like this:
You may be asked to download the Optimize Chrome extension. Go ahead and do that.
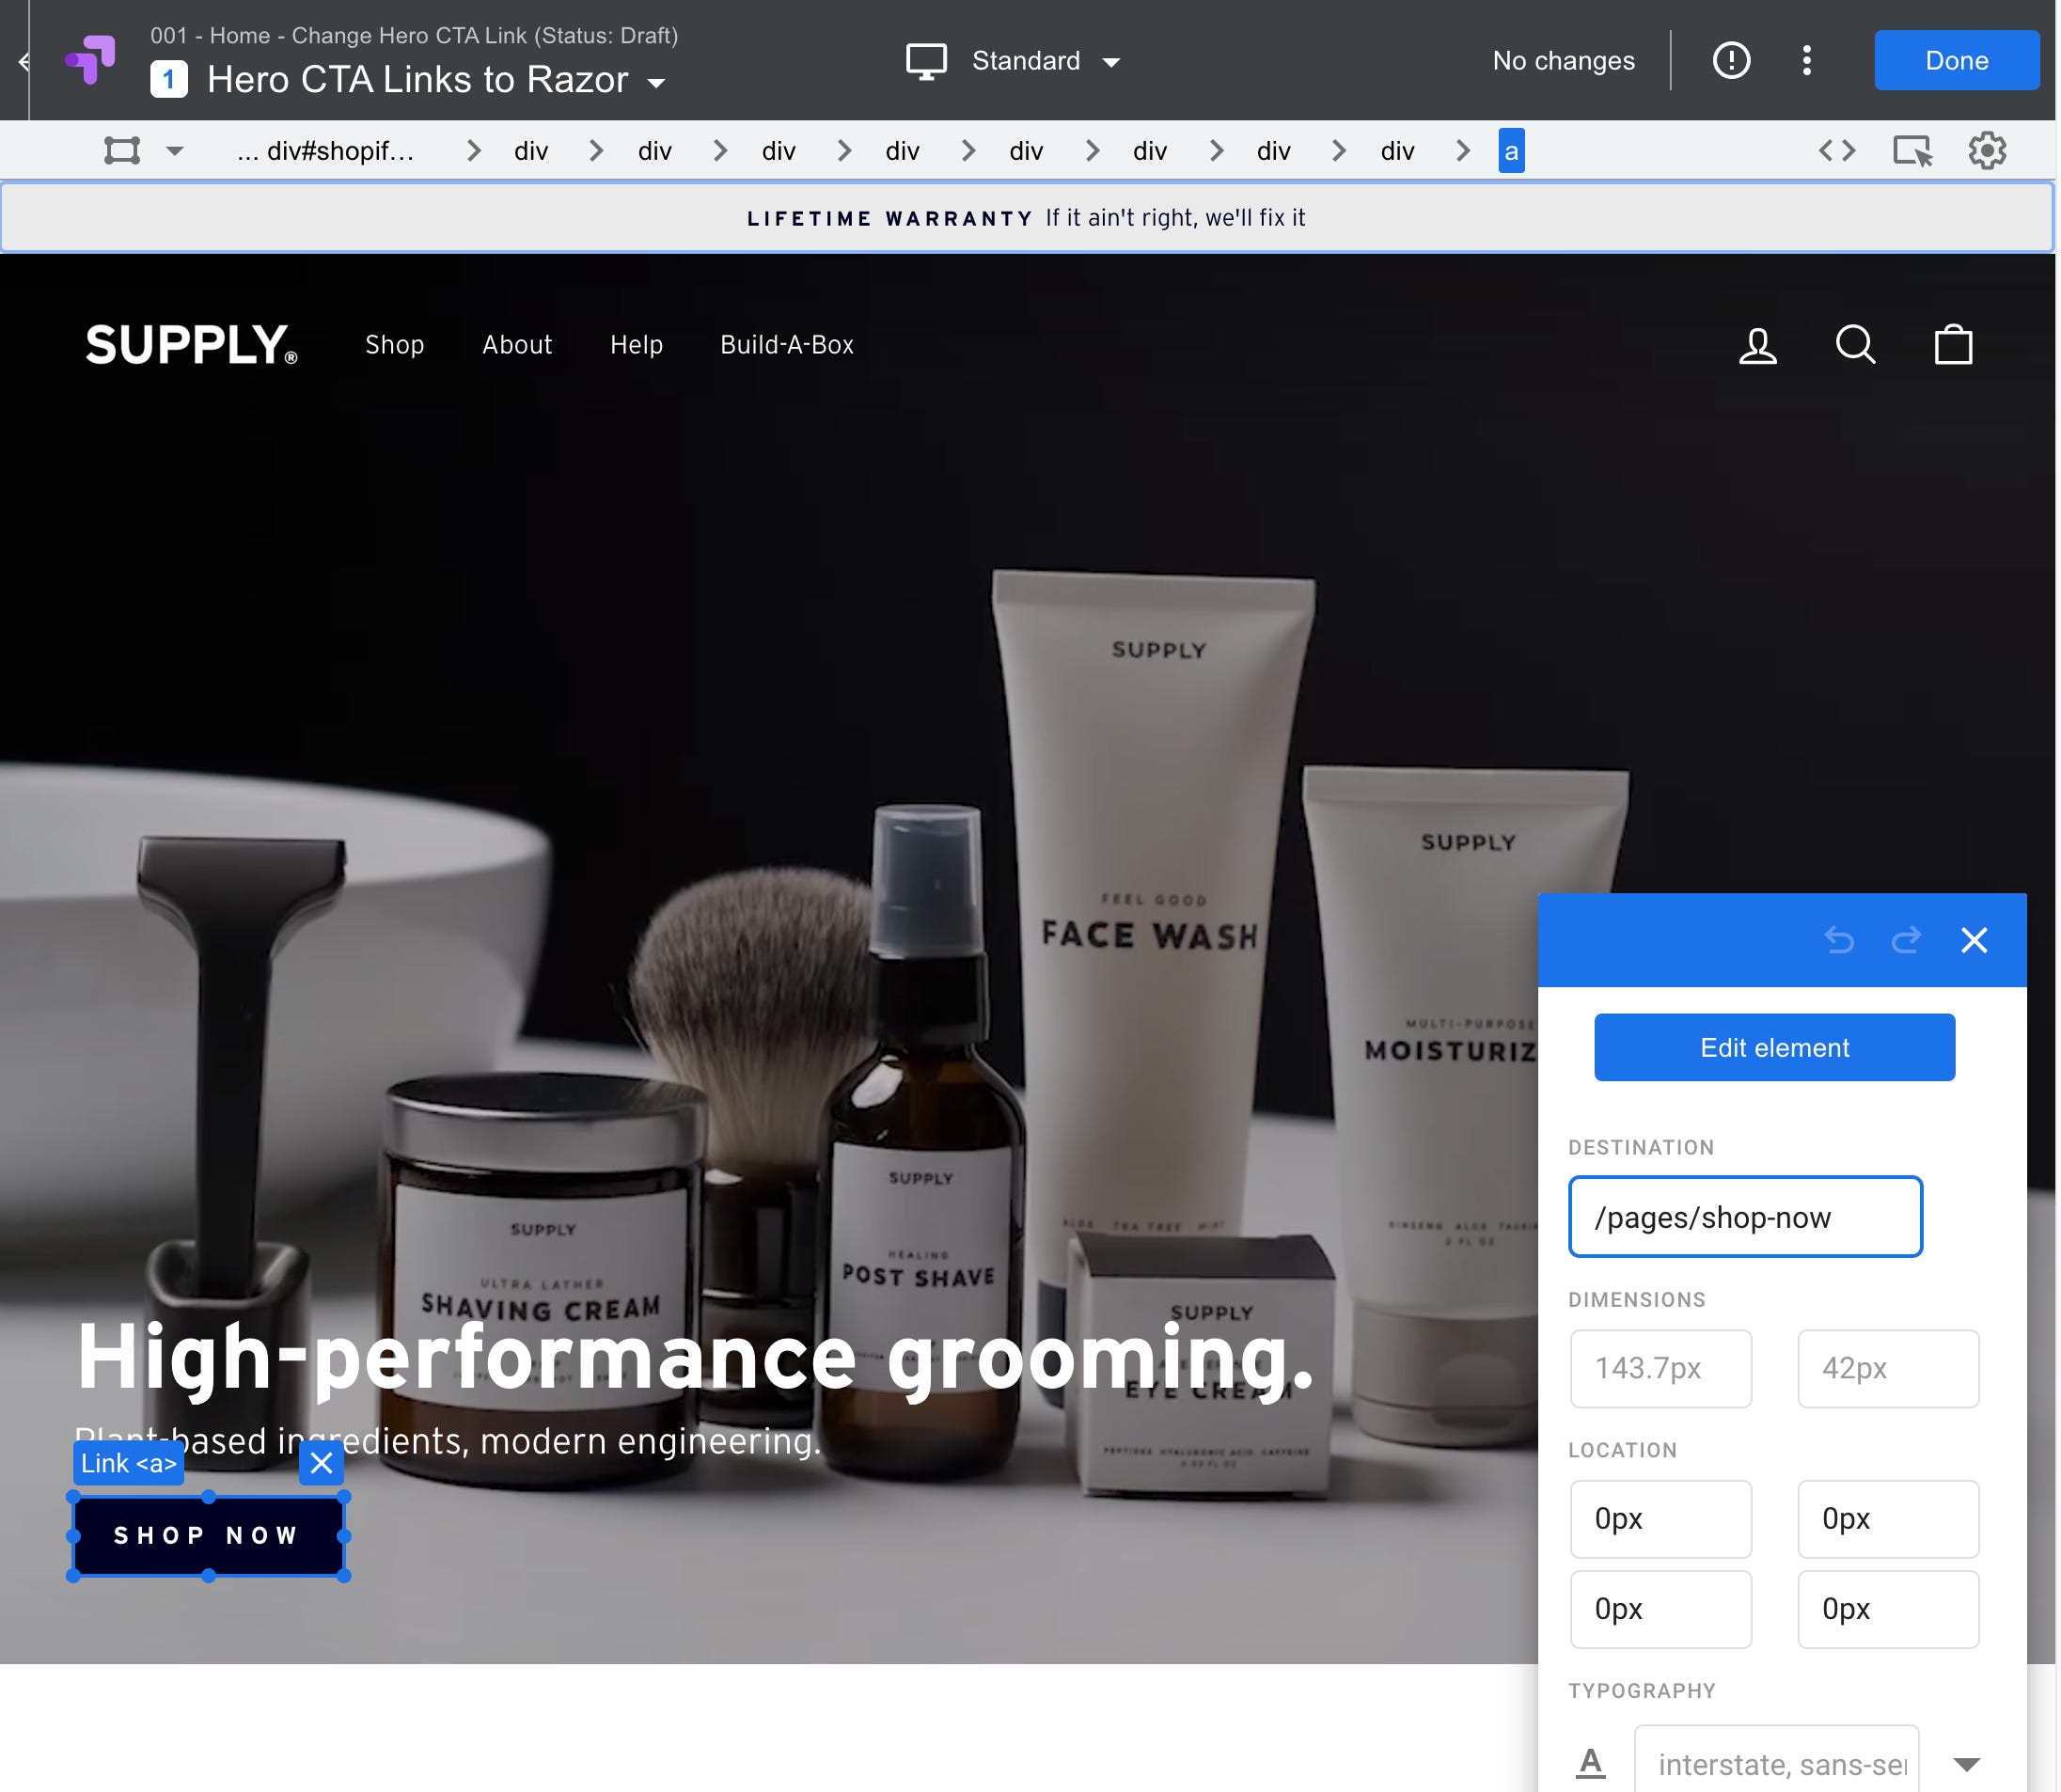
This is Optimize’s visual editor. The way it works is pretty simple. Click on what you want to change and you can change it.
As you can see, when I click on the button it shows me properties of that button I can change. Currently the button links to “/pages/shop-now”.
Any change we make here will only be shown to the 50% of people that fall in our test variant. All we have to do to change this link is update the value of the ‘destination’ field:

Then hit save in the top right corner. And…. We’re done! Hit the “Done” button and it will bring you back to the test page.
You can then preview your test using the “Preview” feature and you’ll notice that in the preview the button links to the new page.
The only thing left is to hit the “start” button to run your experiment and check back in a few days to start seeing the data come in. I recommend running a test for a minimum of 4 weeks which should give you a solid amount of data to make a decision with.
Quick note on page and audience targeting: This test is only running on the home page so the default targeting works. If you want to test something on all product pages, or on a specific product page, you’ll need to edit the page targeting rules. You can find a guide to updating the page targeting rules here.
Where to go from here
As you can see, once you’ve got things set up some tests are incredibly easy to run. I’d recommend you play around in the visual editor to see the extent of things you can change without code.
To give you an idea – you can change any text, links, or images that you see. You can also remove entire elements using the ‘edit element’ button.
Remember, the larger the change in how your site works the bigger impact–positive or negative–it will have on your conversion rate. If you want to get crazy try removing the navigation from your home page entirely. Or the hero section altogether. The results may surprise you.
Eventually you’ll start to have ideas for things that you can’t do without a developer. At that point feel free to reach out to me and I can recommend you some resources for where to go next.
That’s it for this week’s issue. I’d love to talk to you about it and answer any of your questions on Twitter: